
![]()
We have exciting news to share! The payment section of ManhattanDirect 2.0 has been updated to allow for greater flexibility of payment options during the enrollment process. The steps are outlined below.

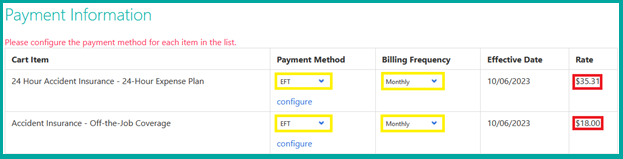
Upon reaching the ‘Payment’ tab during the enrollment process, you will be greeted with a fresh new payment view. Here, you have the power to preview the rates for the products you have chosen by simply adjusting the ‘Payment Method’ and ‘Billing Frequency’ options. To do so, simply click on the arrow located on the right side of the label, which will reveal a drop-down menu. After you have made your selection, the ‘Rate’ shown will automatically update.

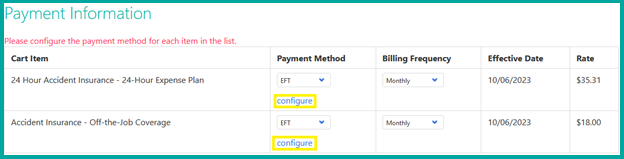
Now you’re prepared to provide payment details for your chosen products, click on the ‘configure’ button highlighted below. This will enable you to customize the payment information for the selected product.

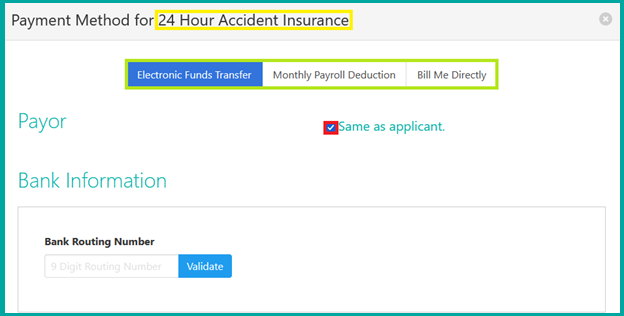
At this point you have the opportunity to explore different payment methods for each product. Keep an eye out for the dialog box that will appear, indicating the product currently being configured, highlighted in vibrant yellow. To choose from the available payment methods, click on the buttons labeled ‘Electronic Funds Transfer,’ ‘Monthly Payroll Deduction,’ or ‘Bill Me Directly,’ as shown in the green outline below. If you wish to create a payment method linked to someone other than the product applicant, just check the box next to ‘Same as applicant,’ highlighted in striking red.

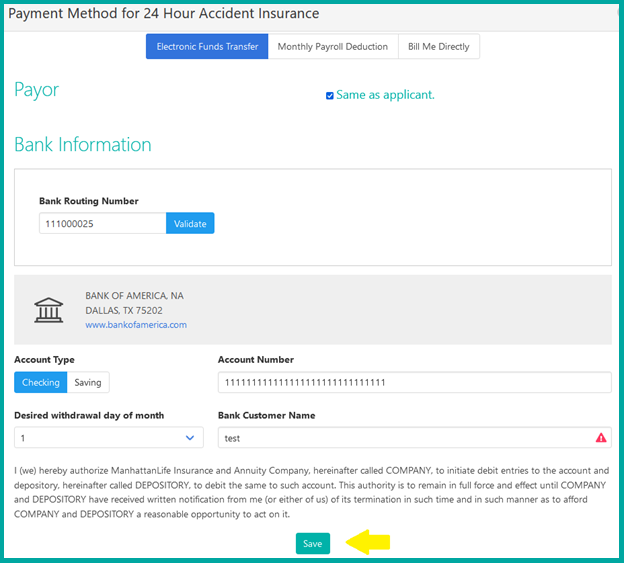
Once you have selected your preferred payment method, simply input the necessary details and hit the ‘Save’ button to securely store your payment information.

At this point, the below screen will appear. Here you have the opportunity to expand your list of available payment methods. Simply click on the ‘Add New’ option to add additional payment methods.
Alternatively, you can select one of the already created payment methods and assign it to a specific product , or even all products. If you wish to assign a payment method to just one product, click on the ‘Assign to Selected Product’ button located to the right of the payment method you have created.
To assign a payment method to all products in an enrollment, simply choose the ‘Assign to All Products’ option. If you need to make any changes or verify the information associated with a payment method, just click on the ‘Edit’ button.


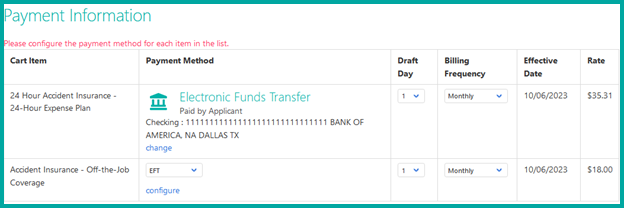
After selecting a payment method for a product, you will be directed to the new payment view. From here, if a product does not have a payment method assigned, simply click on the ‘configure’ button for that specific product. Keep in mind that any product with an existing payment method will be conveniently listed in the ‘payment method’ section.

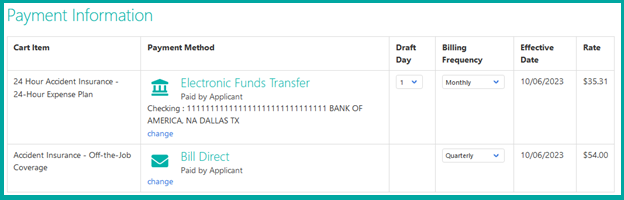
From this point you have the option to either create a brand new payment method, or assign an existing one, following the instructions in Step 4 above. Once all products have been allocated a payment method, each one will be accompanied by an icon representing the chosen payment method, along with relevant information. Moreover, this action will signify the completion of the ‘Payment’ progress bar, situated on the right side of the screen.
We hope this enhancement makes the enrollment process a breeze for you!
![]()
#goldencareagent
#manhattanlife
#mac